Welcome to your new website! This guide will walk you through the first essential steps: logging in and getting familiar with the Site Dashboard and Editor.
Let's get you familiar with the editor behind the wheel.
Before you begin
To access your website editor, you will need an active account. You should have received an invitation email from us to set up your password.
- Login page: sites.constructivdigital.com.au
- Forgot your password? Click here to reset it
- Can't find the email or need help? Contact us for support here.
Video guide
Prefer to watch and learn?
Join Rhys in this quick video as he walks you through everything step-by-step.
Written guide
For those who prefer to read or need a quick reference, here are the detailed steps covered in the video.
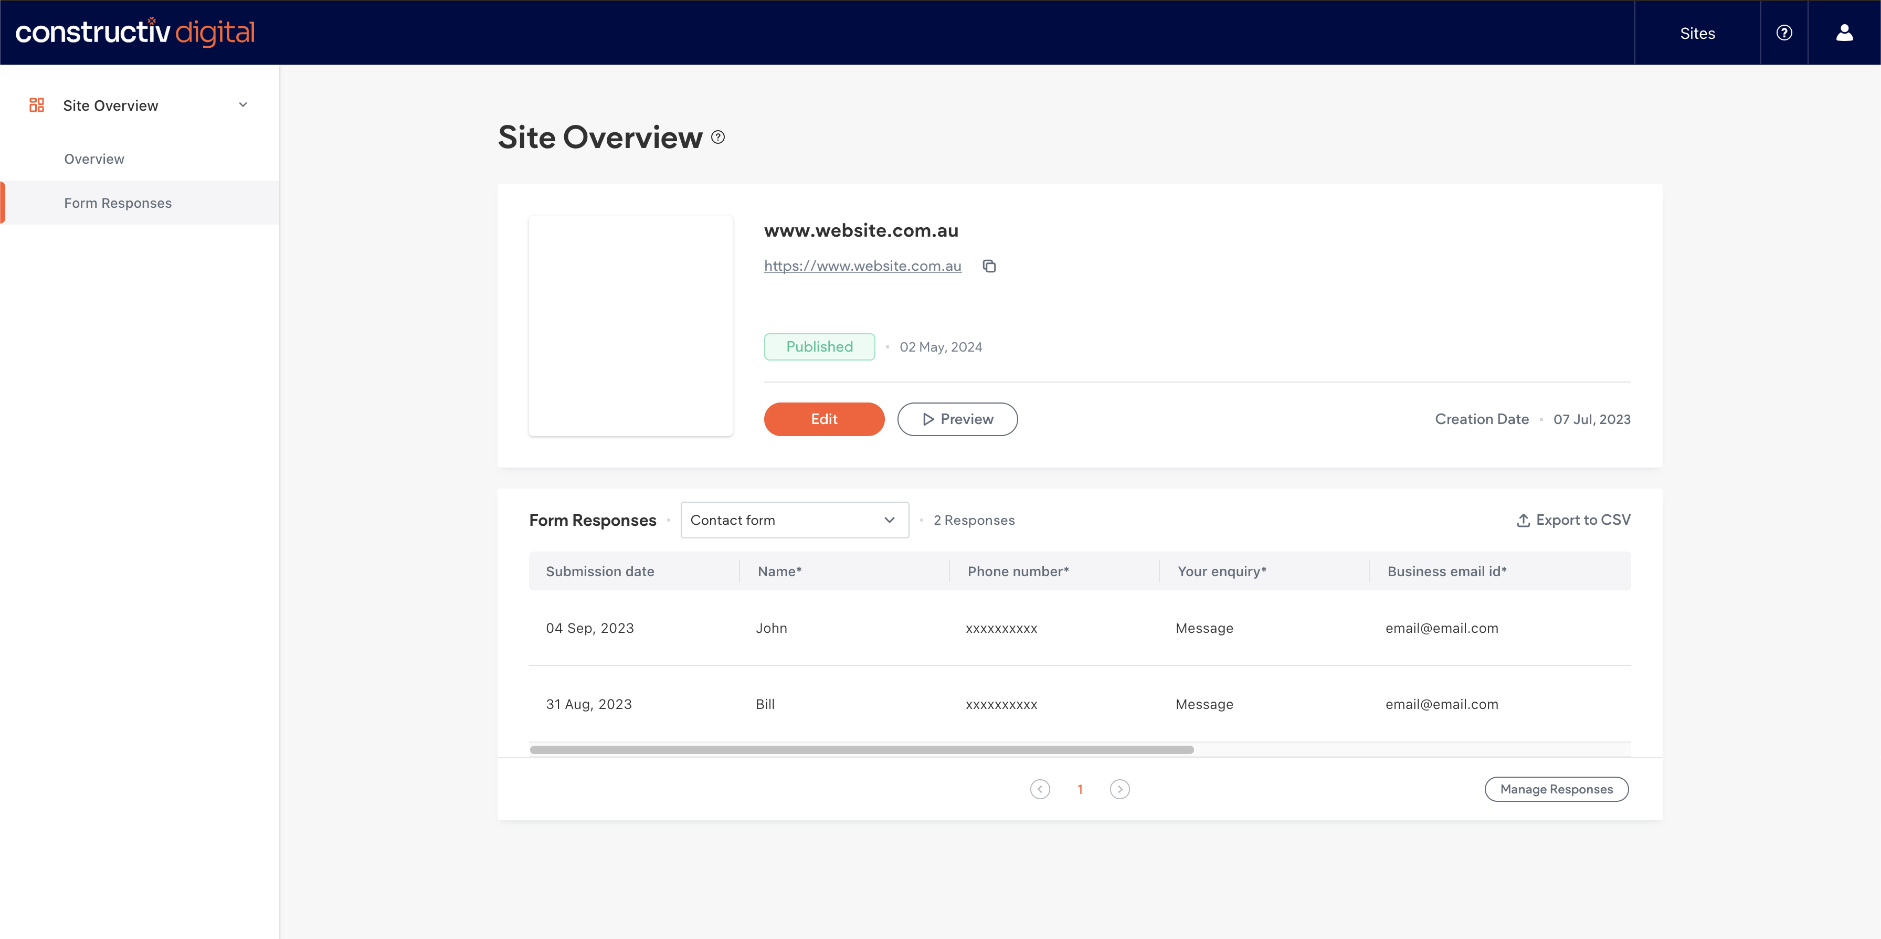
1. The site overview dashboard: your mission control
Once you log in, you will land on the Site Overview page. This is your central hub.
Key Features:
- Displays your website's status (e.g., Published) and connected domain.
- Shows the date the site was created.
- Allows you to Preview the site or click the orange Edit button to open the editor.
- Lets you review form submissions and leads.
A Note on Viewing Leads: While you can see form responses here, we highly recommend viewing all leads (including phone calls and recordings) in your
iseekplant profile. The interface is more comprehensive and provides a complete picture of your business opportunities.
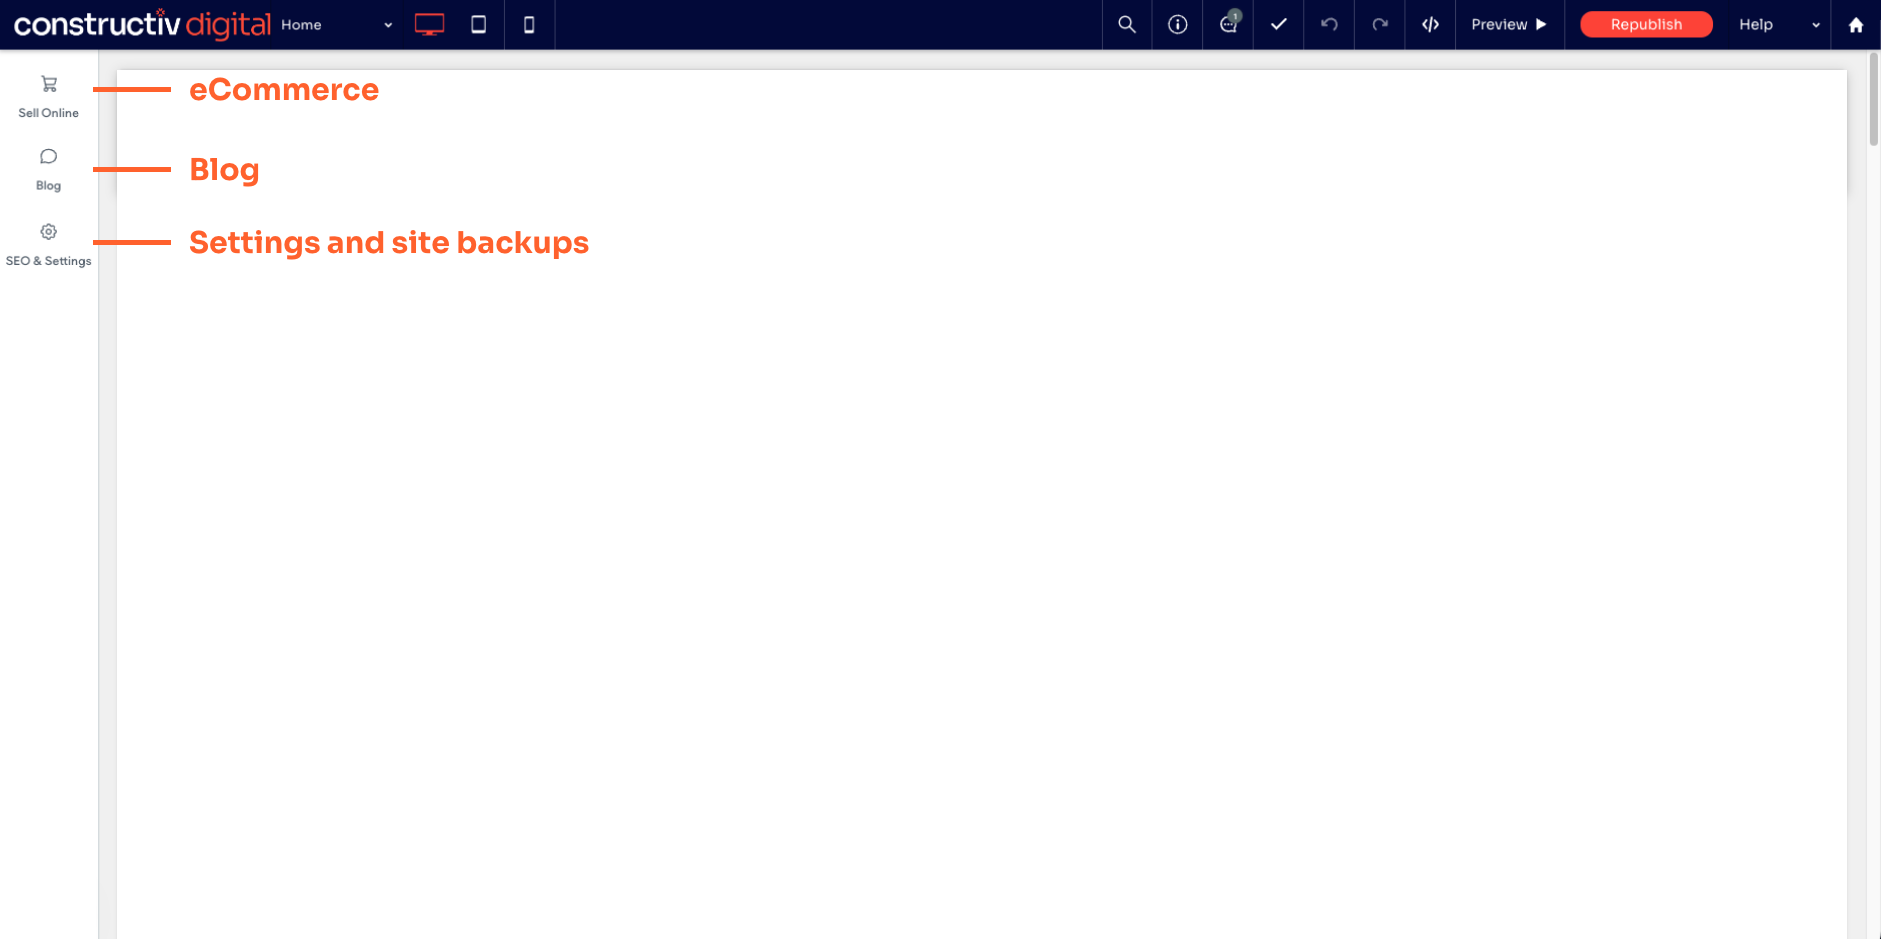
2. The website editor: Where the magic happens
Click the orange Edit button from the site overview screen to enter the editor. This is where you can make changes to your live site.
Don't worry, your changes aren't live yet! The editor automatically saves your work as a draft. Your changes will only appear on the public website after you click the
Republish button.
3. The top toolbar: your core controls
The bar across the top of the editor contains essential functions:
- Page dropdown: Switch between the different pages of your website (e.g., Home, About Us, Contact).
- Device views: Instantly see how your site looks on Desktop, Tablet, and Mobile.
- Auto save: Indicated changed are being saved or have been saved.
- Undo/redo: Made a mistake? No problem. Use these arrows to go back and forth.
- Preview: See a full-screen preview of your draft website without the editor tools.
- Republish: This is the most important button! Click this to make all your saved changes live on your website.

4. The left-side panel: advanced features
This panel on the left provides access to your site's powerful features, if they are enabled on your plan. This is where you would manage your:
- eCommerce Store
- Blog
- Content collections (databases)
What's Next?
Great work! You're now familiar with the basics of navigating the website editor.
- Remember: Changes are saved automatically but only go live when you republish.
- Next step: Now that you know your way around, let's learn how to edit text.